How to Upload Locals Songs in Itunes Mac
While streaming music seems to exist all the rage these days, nothing really beats actually owning your music. You may have acquired a vast collection of thousands of songs on your MacBook or iPhone over the years, so y'all definitely desire to make sure that you back upwardly your iTunes Library or Music Library, as it'southward called now in macOS.
Whether you are yet listening to your digitally ripped CD collection from high schoolhouse or streaming the latest hits on Apple Music with iCloud Music Library, y'all'll want to make sure that everything is backed up and safe. Nix is worse than losing your favorite tunes because of a mistake. Here are a few different ways to back up your iTunes library.
Offset, brand sure your entire library has been locally downloaded
If y'all use iCloud Music Library or the iTunes Shop, you may accept some or all of your music stored in the Cloud. But to truly make certain that your purchased and owned content is backed up, you'll want to download a local copy of all of your music to your Mac.
To download specific items in your iCloud Music Library correct now to your Mac'southward drive, practice the following:
-
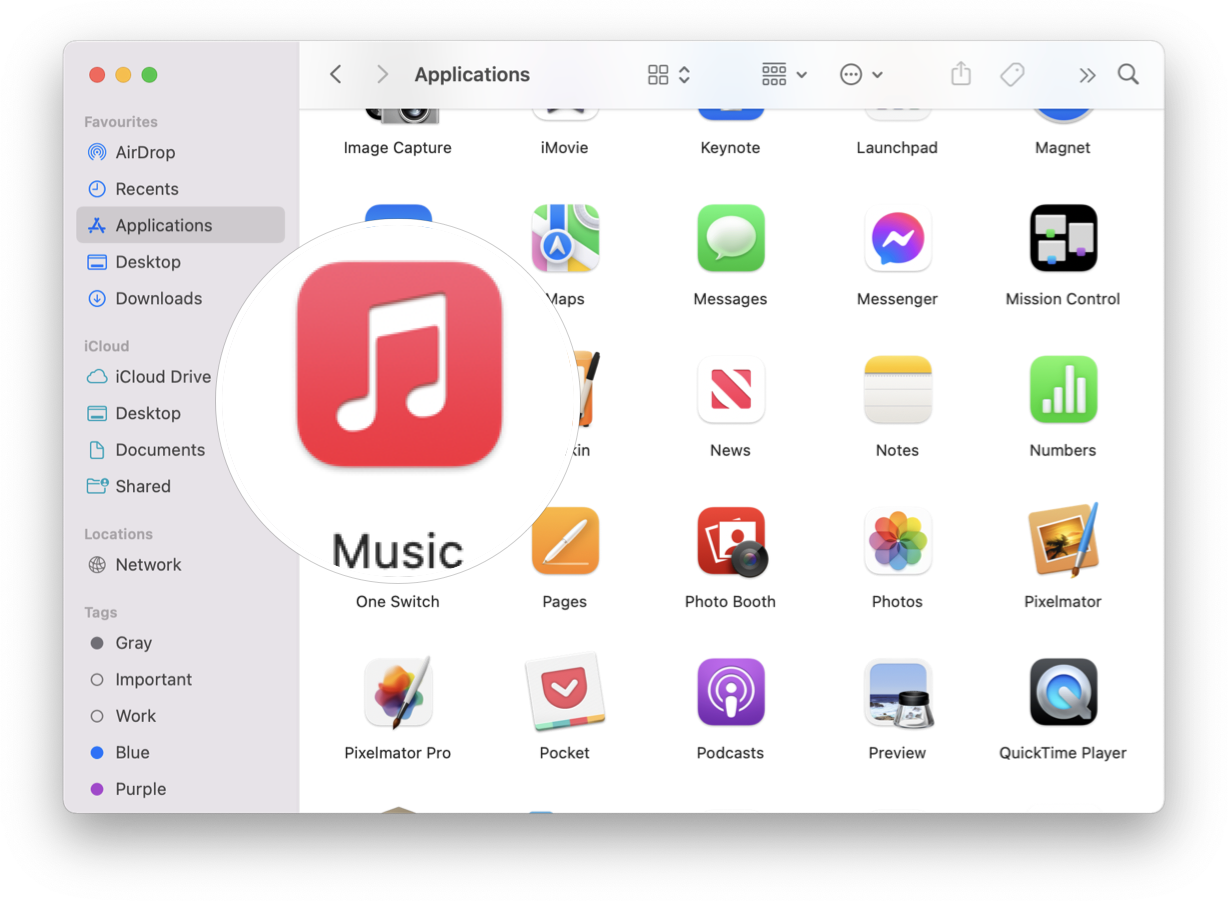
Launch Music (or iTunes on Mojave and earlier) on your Mac.
 Source: iMore
 -
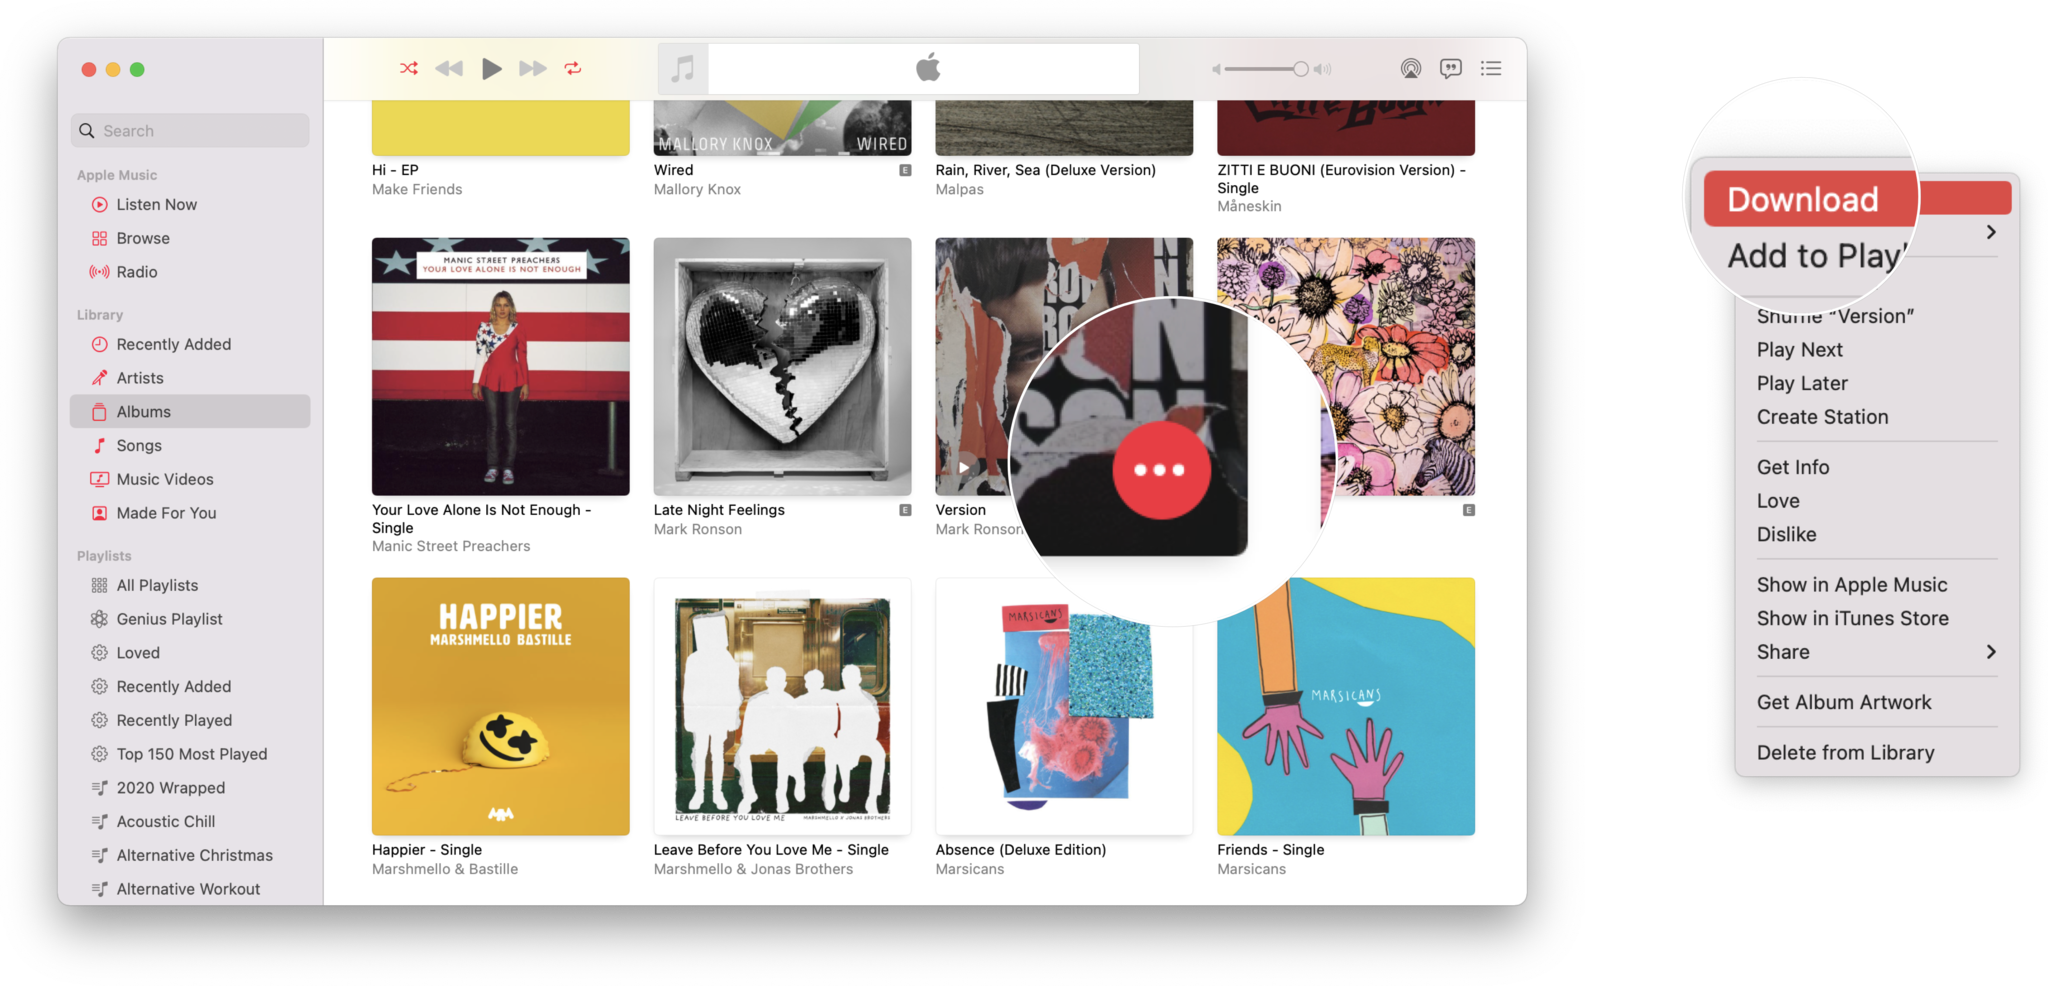
Detect the Artist, Albums, or Songs that you want to download.
Tip: In any of these views, you can striking ⌘A to select all.
- Click the ••• push to bring up a popular-upwardly menu. Alternatively, you tin Command-click or use the secondary click y'all have prepare up for your mouse or trackpad.
-
Click Download to initiate the download of these items.
 Source: iMore


And if you want to start automatically downloading everything that you lot add together to your Apple Music library from this point forward, and so information technology'due south piece of cake peasy! Here'southward how:
-
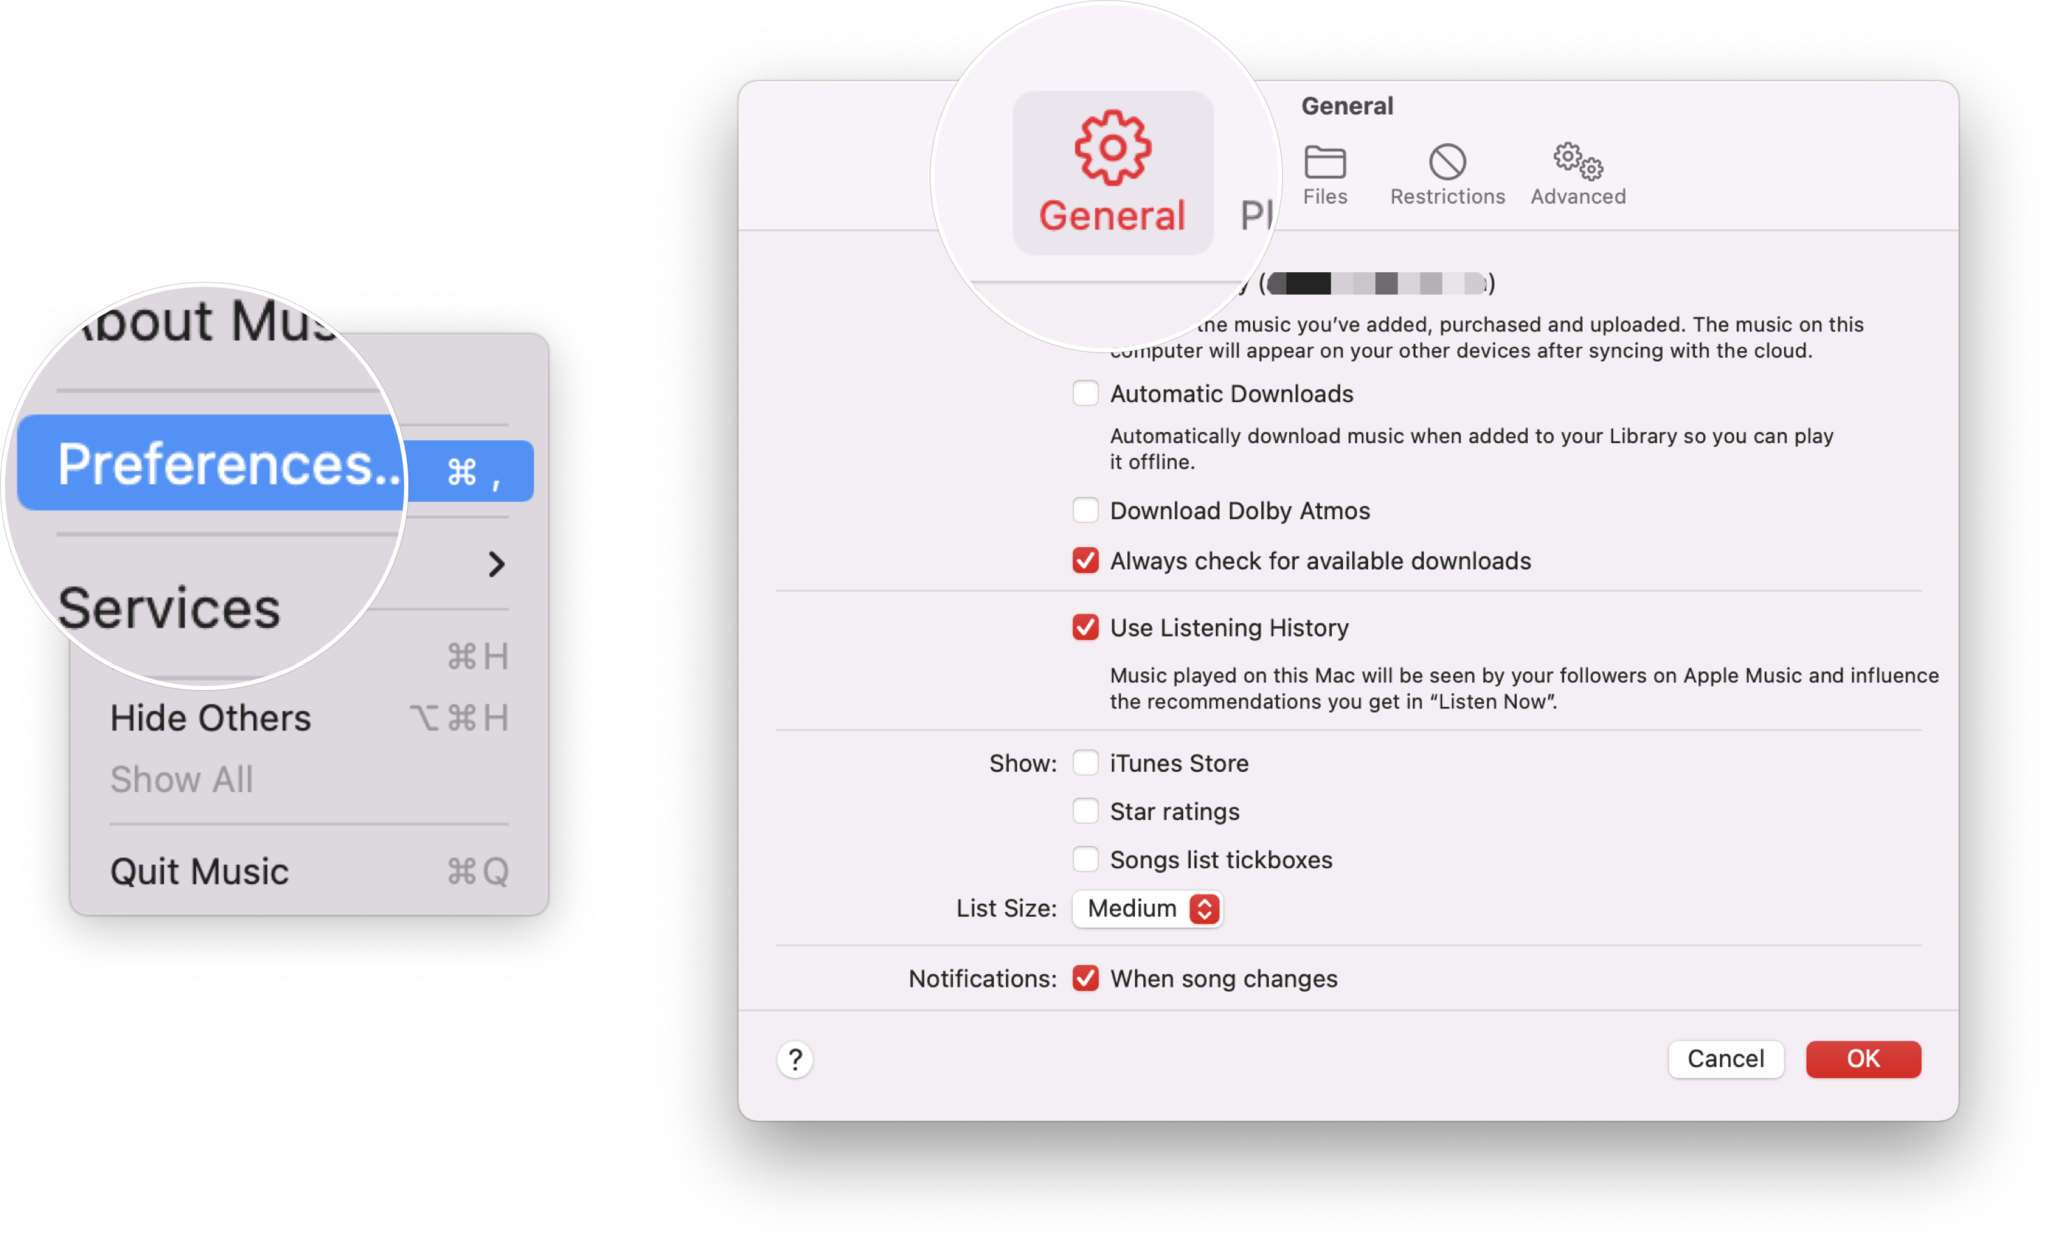
Launch Music (or iTunes on macOS Mojave and earlier) on your Mac.
Source: iMore - Click Music in the menu bar.
- Click Preferences (or press ⌘, on the keyboard).
-
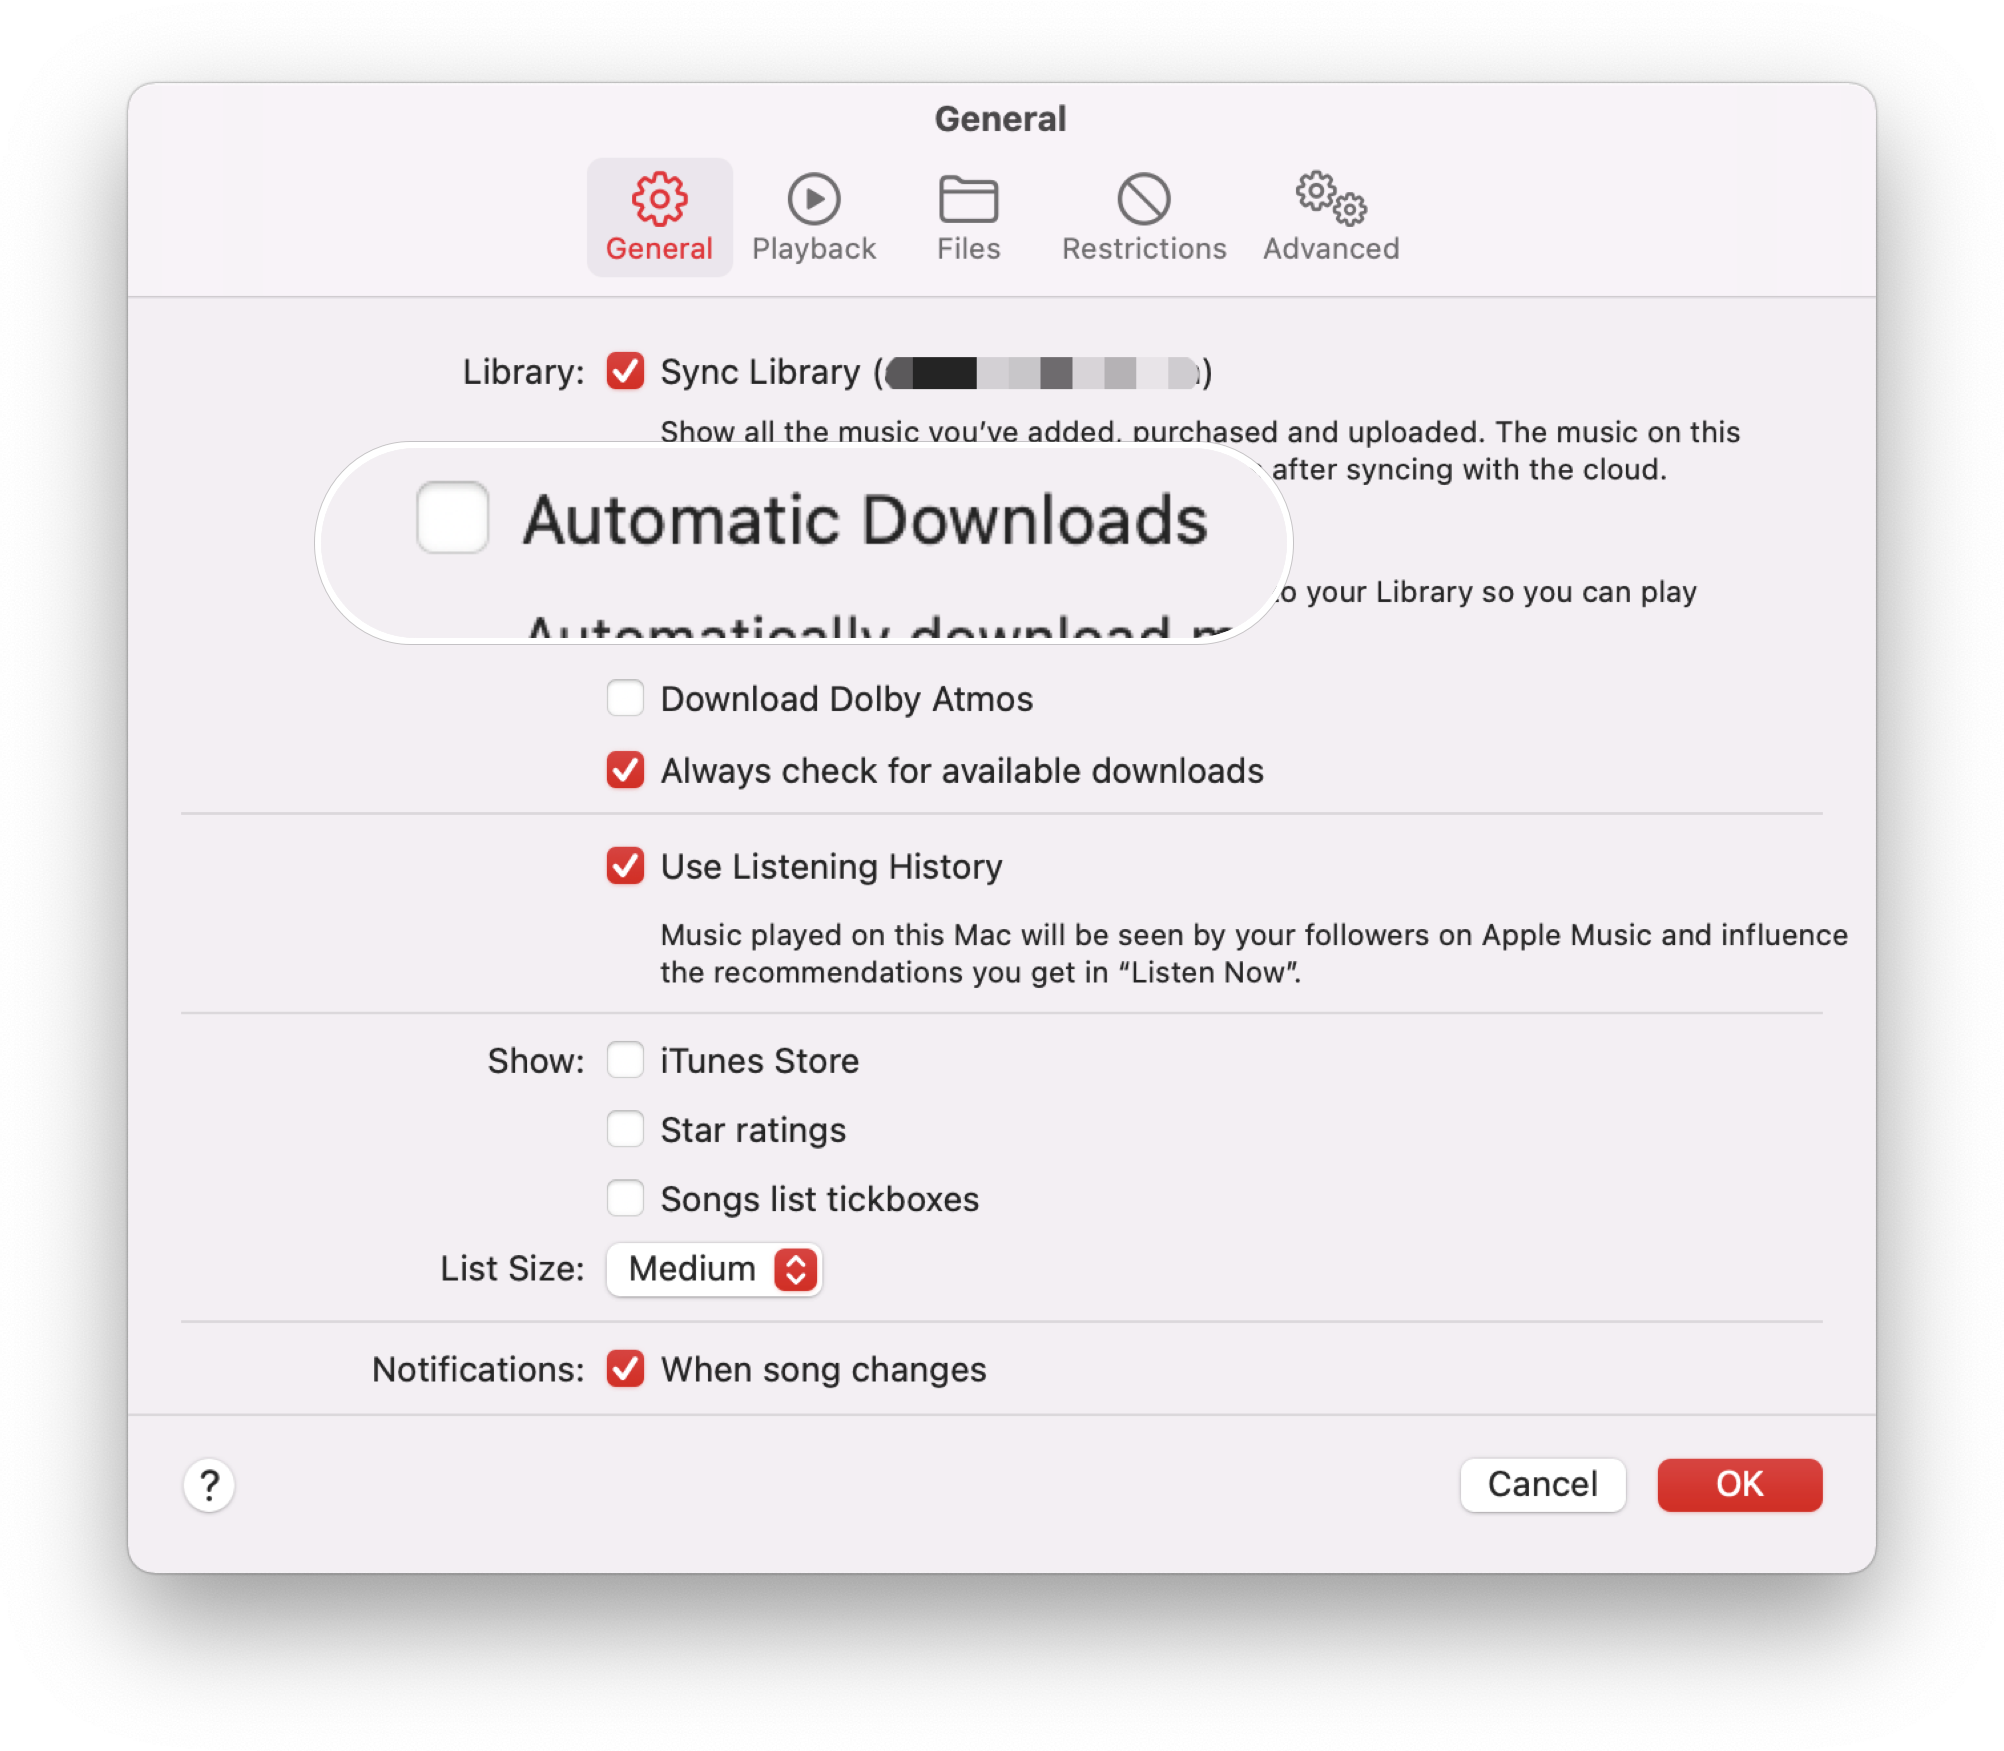
Make sure you lot're in the General tab.
 Source: iMore
 -
Click the box for Automatic Downloads to turn information technology on.
 Source: iMore


Once that is turned on, any music you add to your Apple tree Music library volition be downloaded automatically to your Mac'due south hard drive.
How to support iTunes Library via Time Machine or some other backup service
One of the easiest means to make certain that your iTunes or Music Library is e'er backed upward is to use Time Automobile, which is already built-in to your Mac. With this feature enabled, yous can automatically support and restore your Mac with Time Machine and whatsoever of the best USB-C external hard drives. The restore functionality lets you jump dorsum in Time Machine's history to recall it.
But Time Machine may not exist enough. We also recommend having an offsite backup programme for your Mac as well, just in instance something like a burn down happens, and you lose your external hard drive.
How to manually dorsum upwardly your iTunes library
If you're not employing a Mac-wide fill-in service (really, though, you should get on that), or if you want to manually back up your iTunes library separately, here's how to get nearly doing that:
Consolidate your library
To ensure that all of your iTunes files are in the aforementioned place when y'all brand a manual backup, you lot should starting time consolidate your iTunes library.
- Make certain you've downloaded a local re-create of your music to your Mac.
-
Launch Music (or iTunes in macOS Mojave or earlier) on your Mac.
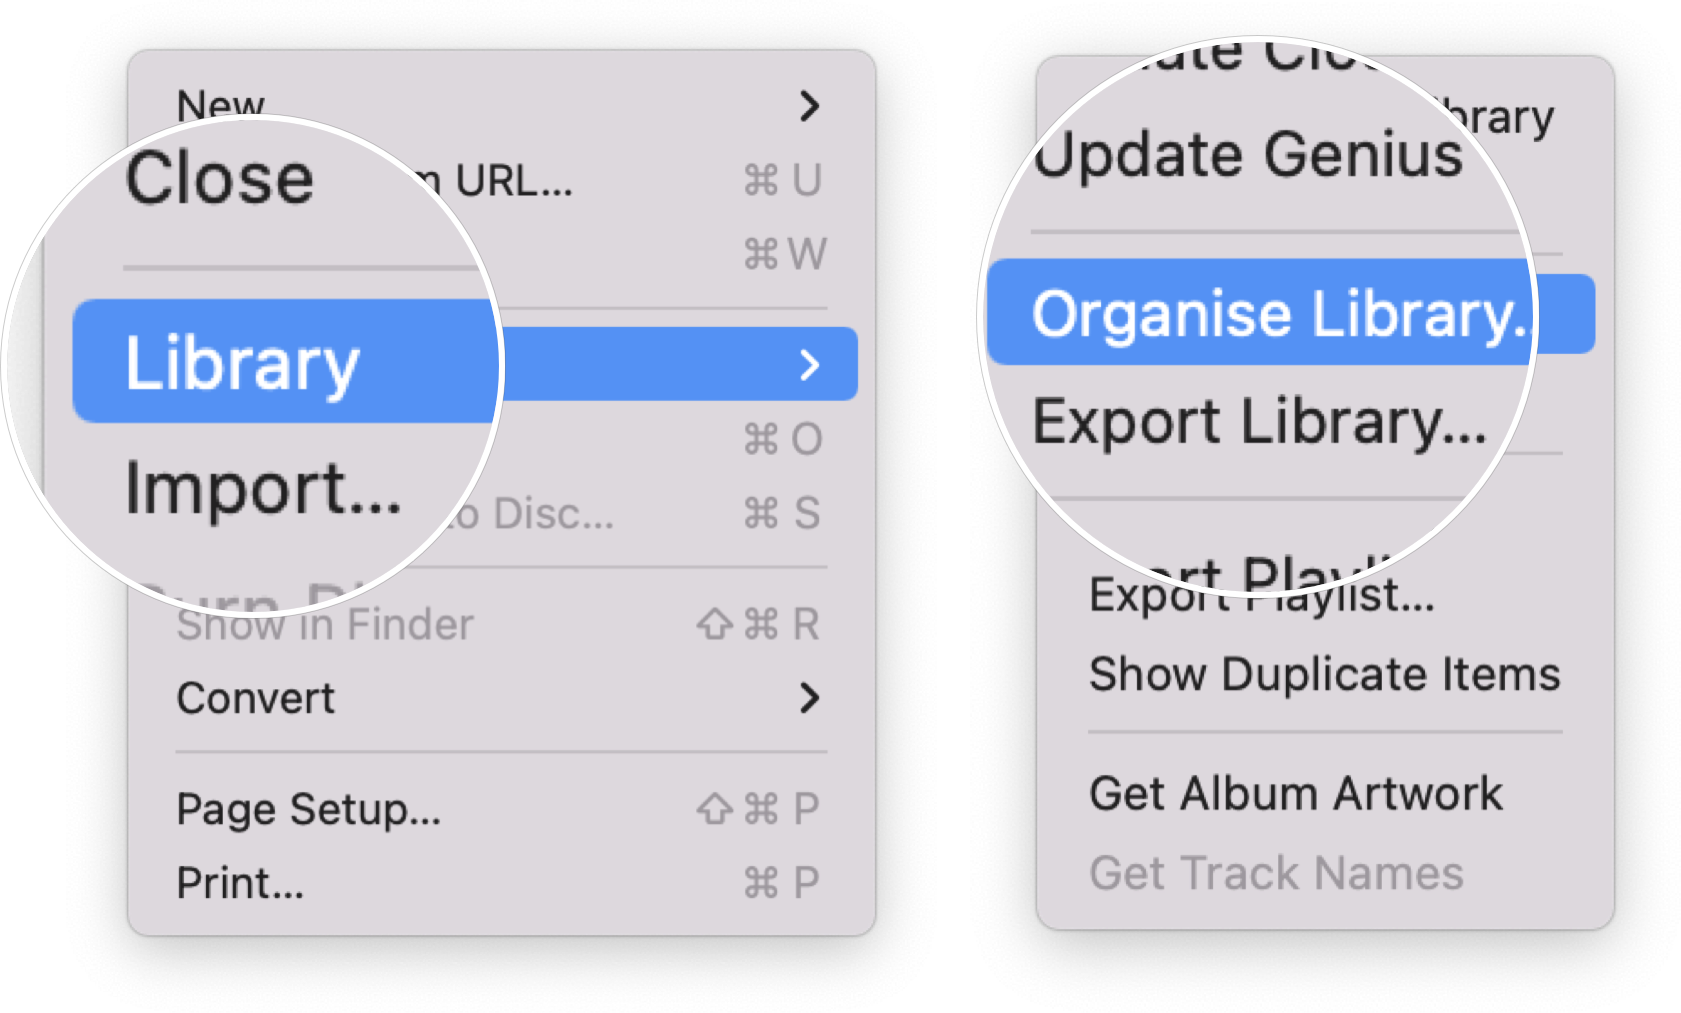
Source: iMore - Click File in the upper left corner of your Mac's screen.
- Hover your cursor over Library in the drop downwards carte du jour.
-
Select Organize Library from the secondary carte du jour.
 Source: iMore
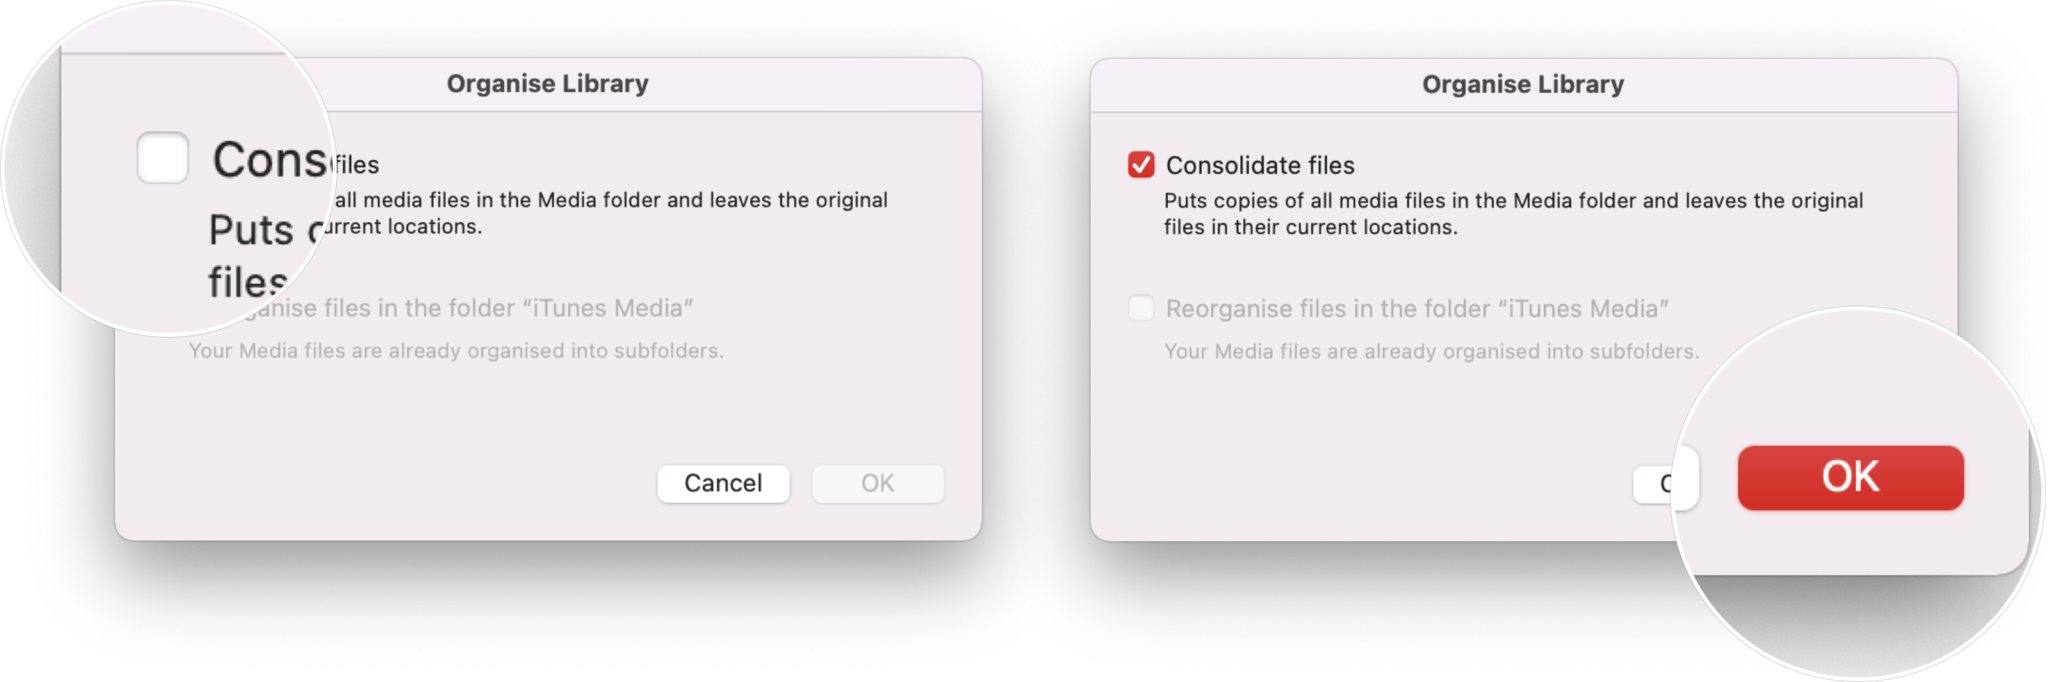
 - Tick the box for Consolidate Files when the Organize Library window appears.
-
Click OK.
 Source: iMore


This volition make a copy of all files in the iTunes media folder, leaving the originals in their current location.
Copy your iTunes library to a backup source
- If you are using an external hard bulldoze, connect it to your Mac using a USB cable.
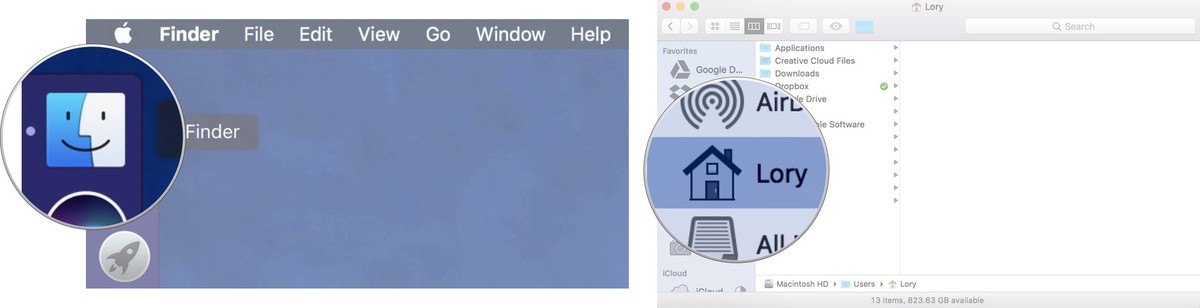
- Click on Finder to open a Finder window.
-
Select your Mac's Hard drive.
 Source: iMore
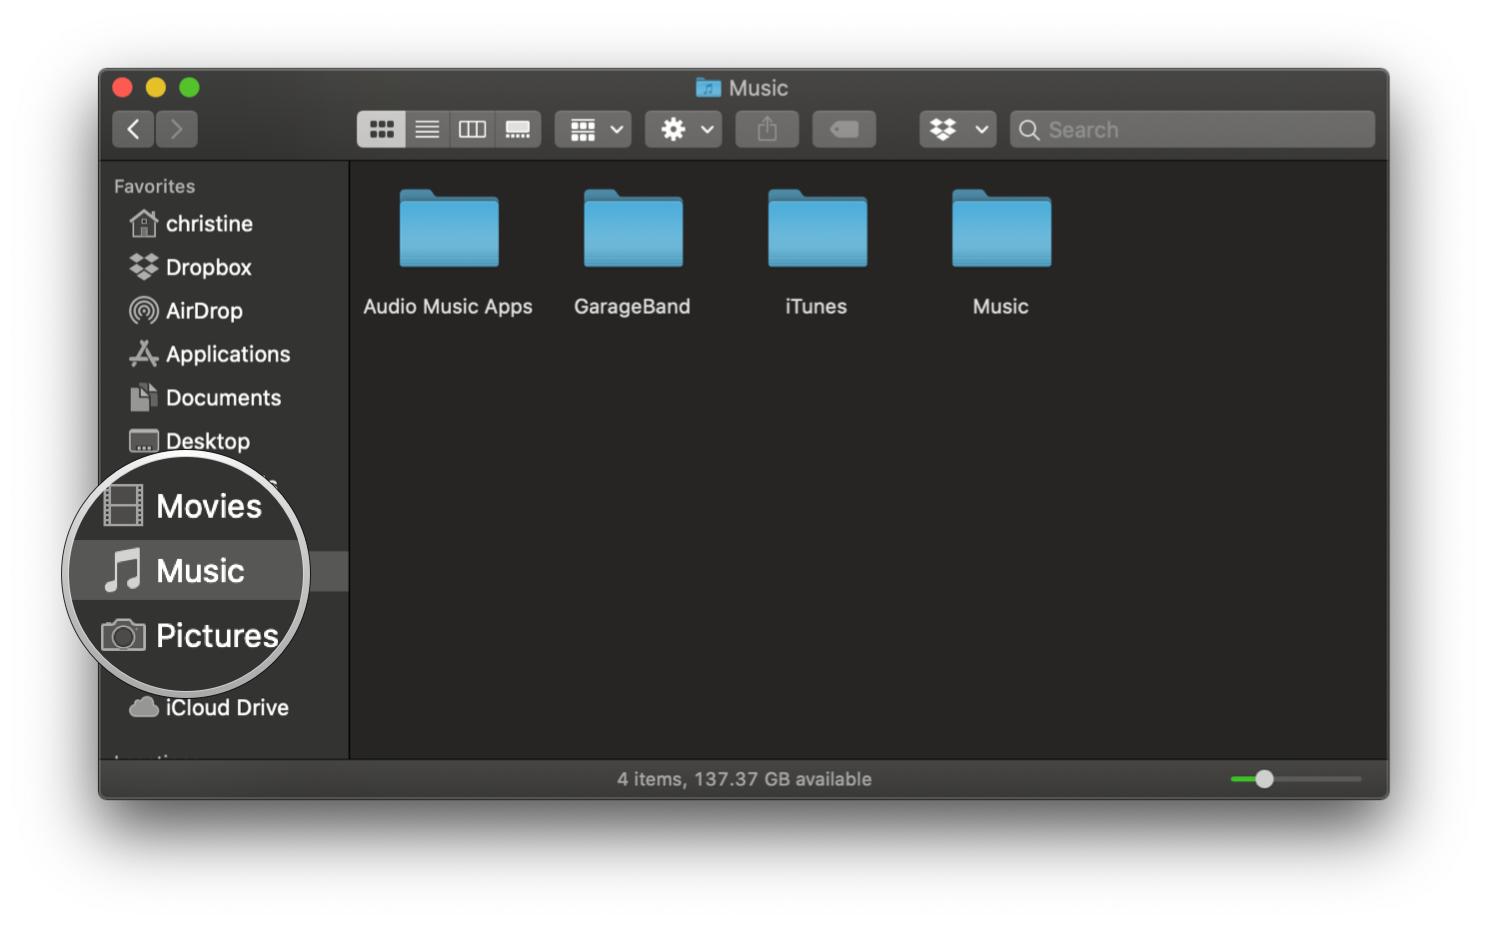
 - Click on Music in the sidebar. If Music is not in your sidebar, but drag-and-drop the Music folder to the sidebar.
-
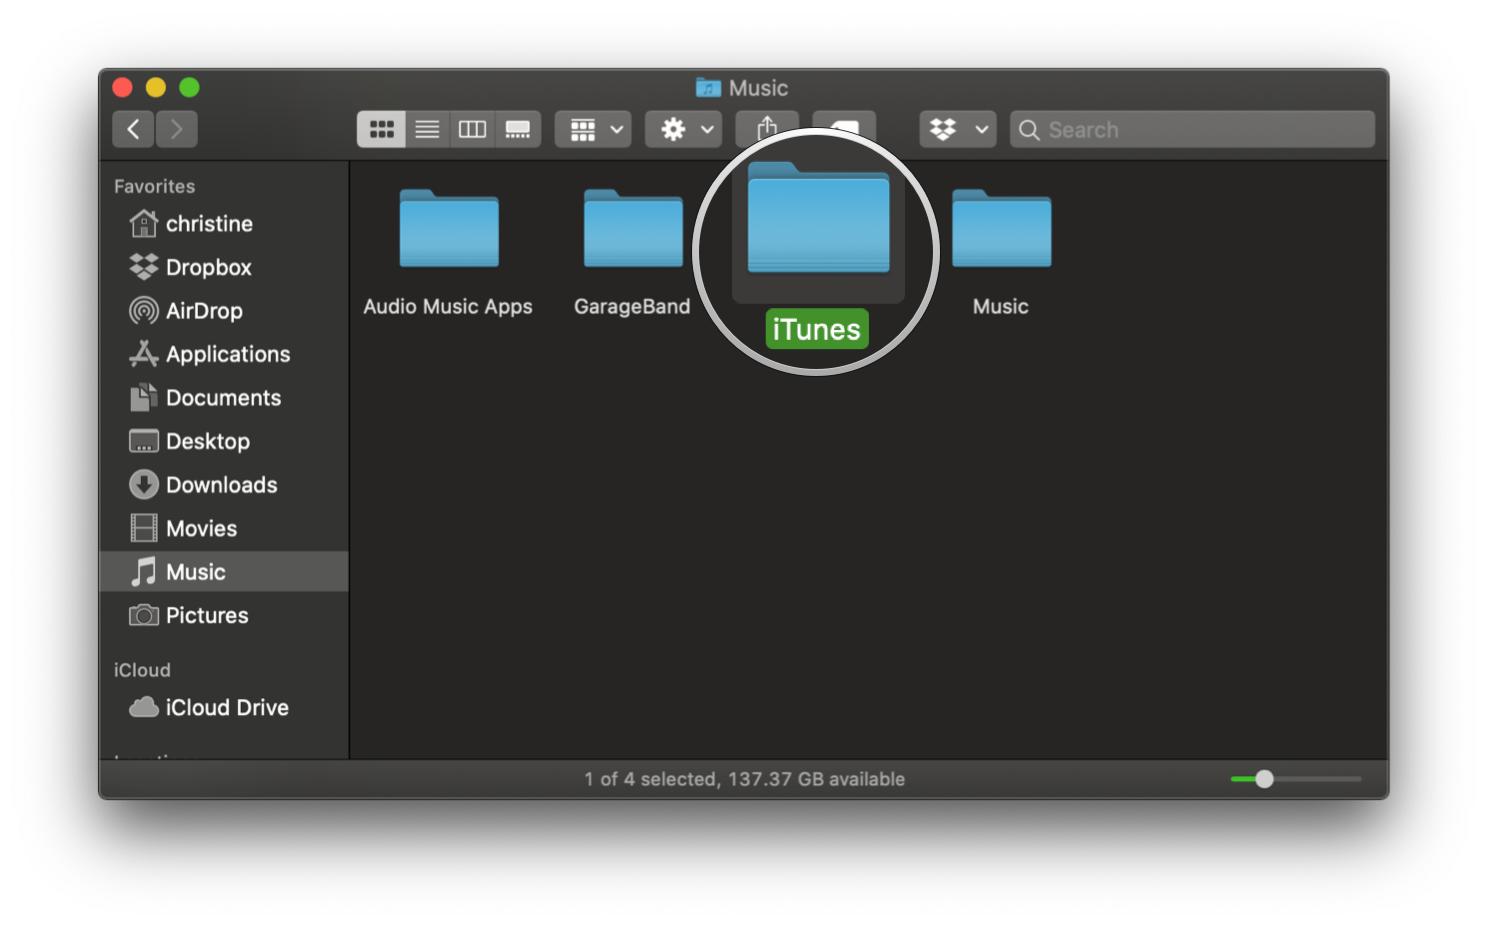
Select the Music folder (or iTunes on macOS Mojave and earlier) and drag that folder to the external hard bulldoze icon on your desktop or copy information technology to your online backup service.
 Source: iMore
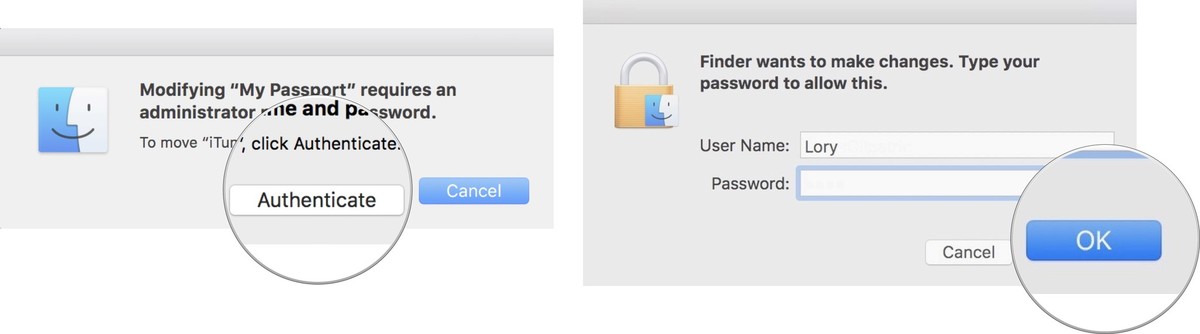
 - Click Authenticate, if prompted, to requite permission to make a copy of the iTunes folder.
- Enter your administrator password.
-
Click OK.
 Source: iMore


The re-create process will begin. This could take a very long time, depending on how big your Music/iTunes library is. So, sit down back, relax, watch a moving-picture show, or whatever you lot practise to pass the time.
Desperate times call for desperate measures
If you lot are about to do something wild with your Music or iTunes library and don't have a way to back it upward on an external difficult drive or online backup service, you can brand a temporary fill-in that you store right on your Mac by duplicating your library. This is, past no means, a solid backup program, just information technology tin can exist useful in a pinch.
Notation: After making a copy, it is a proficient idea to move the copied binder to an like shooting fish in a barrel-to-find location that is split up from any binder you lot plan to brand changes to (like the Music folder). This copied folder should be deleted immediately after it is no longer needed because it takes up actress space on your figurer'south hard bulldoze unnecessarily and could cause confusion with your about electric current Music or iTunes folder.
- Click on Finder to open a Finder window.
-
Select your Mac's Hard bulldoze.
Source: iMore -
Click on Music in the sidebar.
Source: iMore - Correct-click or control-click on the Music binder (or iTunes folder if yous're still on macOS Mojave or earlier).
-
Select Indistinguishable from the popup carte du jour.
-
The copy process volition begin. This could take a very long time.
 Source: iMore
-
-
Movement the copied iTunes or Music binder to a new, piece of cake-to-notice location.
- Delete the copied iTunes or Music folder once you no longer need the temporary backup.

Get to backing up
If you've got a huge music library, you want to exist able to take that with you when y'all upgrade your devices so it'southward a cracking idea to dorsum it up. It's as well prudent to do so in case of theft, disaster, or mechanical failure. Hopefully the above guide will have your music collection backed up in no time.
Updated March 2022: Updated for macOS Monterey.
Source: https://www.imore.com/how-back-your-itunes-library
Postar um comentário for "How to Upload Locals Songs in Itunes Mac"